
This project is very quick and easy and but doesn't look it. As with many of my projects, this one can be made for any holiday or occasion. When my daughter was younger she made Christmas plates for her Grandparents. She was so pleased to give them something she had made that they could use and would last for a very long time. I have done this project for years with 4-H and after school community education classes. It has been a favorite of children of all ages.
You can find the clear glass plates at most Target or WalMart stores for about $1.00. The Modge Podge is a couple of dollars and can be found at any craft store. (Michael's, Hobby Lobby, Jo Ann Fabrics) If you have fabric scraps at home, look through those first. You never know what you might find. In the photo above I have a Thanksgiving, Halloween, and Easter example. This is great for Mother's Day as well. Find a pretty floral pattern and the kids can make Mom their own special gift.
This plate can be used for cookies or snacks, but be sure to read the ***IMPORTANT*** below the supply list.

SUPPLY LIST
1- 8 inch Clear Glass Plate
Modge Podge or any Decoupage glue
1- Foam Brush
10x10 inch piece of Fabric
I suggest an 8 inch plate but you can also use a 10 or 12 inch clear glass plate. If you buy a bigger plate then make sure your piece of fabric is bigger than the plate. About one inch of fabric overhang around the plate. I usually buy 1/4 yard of fabric which will be enough for 4-5 plates.
***IMPORTANT*** Once the plate is complete and dry, DO NOT get the bottom (back) of the plate wet. DO NOT put it in the dishwasher. If you get glue on the front of the plate while making it, gently wipe it off with a damp cloth. When using this plate for cookies or snacks, just wipe the front clean with damp cloth.
1. You are going to want to cover the work area with newspaper, plastic, or what works great is an old vinyl table cloth. Have your child turn the plate upside down. They will be glueing the bottom (back) of the plate.
2. Depending on the age of the child making this project you may need to cut the fabric for them. Either way the fabric should be cut large enough so that it is at least one inch larger all around.
3. Pour a little of the Modge Podge into a disposable dish. With the foam brush have your child "paint" the bottom (back) of the plate completely with the Modge Podge. It should be covered to the edges and have a fairly thick coat on it. You should not be able to see through the plate.

4. With RIGHT side of the fabric facing down, place the the fabric on top of the glue.

5. With your brush, (or fingers) smooth out all of the air bubbles in the fabric.
6. Once you are sure the air bubbles are gone, cover the fabric completely with the Modge Podge.
Just as you did in step three, only now you will brush it on to the fabric. Don't be afraid to get a lot of the glue on the fabric.
***Be sure to go all the way to the edges. You don't want the fabric to come off later.

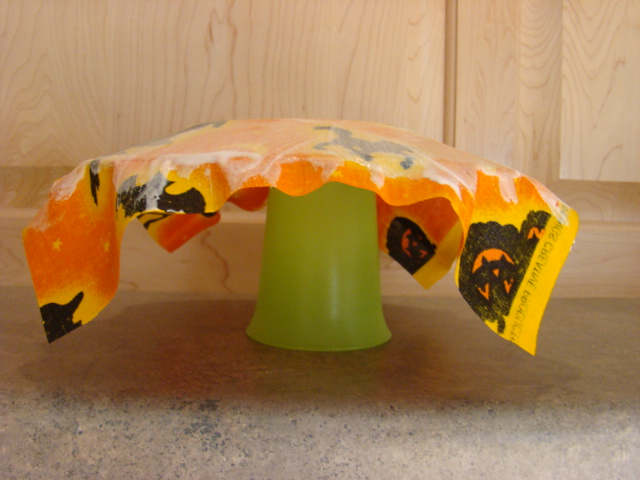
7. Let Dry. The best way to dry it is to find a small glass and place the plate on top off the glass.(upside down) You will know it is dry when it is no longer white.
8. Trim the excess fabric from around the plate. You are done!
Let me know if you child enjoyed this project or if you have any questions.